

3 Cake Topper Ideas with the Glowforge Aura

A LITTLE BIT ABOUT THE AURA
Let's first talk about the Glowforge Aura laser! This compact desktop craft laser can work with various materials, including acrylic and wood. While it has some color limitations for acrylic, its ability to cut and engrave intricate designs makes it perfect for personalized cake toppers, like the ones I’m sharing in this tutorial.
DESIGNS & MATERIALS
To get started, you'll need a design for your cake topper. You can create your own, find designs online, or choose from Glowforge's catalog. (psst, download these exact designs I’m using down below!) As for the materials, the Glowforge Aura works perfectly with materials like light maple plywood and medium black acrylic.


CREATING THE CAKE TOPPERS
Now, let's dive into the fun part – creating your cake toppers! In this video below, I walk you through the process of creating three cake toppers, adjusting the cut and engrave settings, and making any adjustments along the way. I hope this step-by-step guide gives you some ideas on what can be made with the Glowforge Aura!
— To download free file: Click button to open file, right click and select “Save As…” —
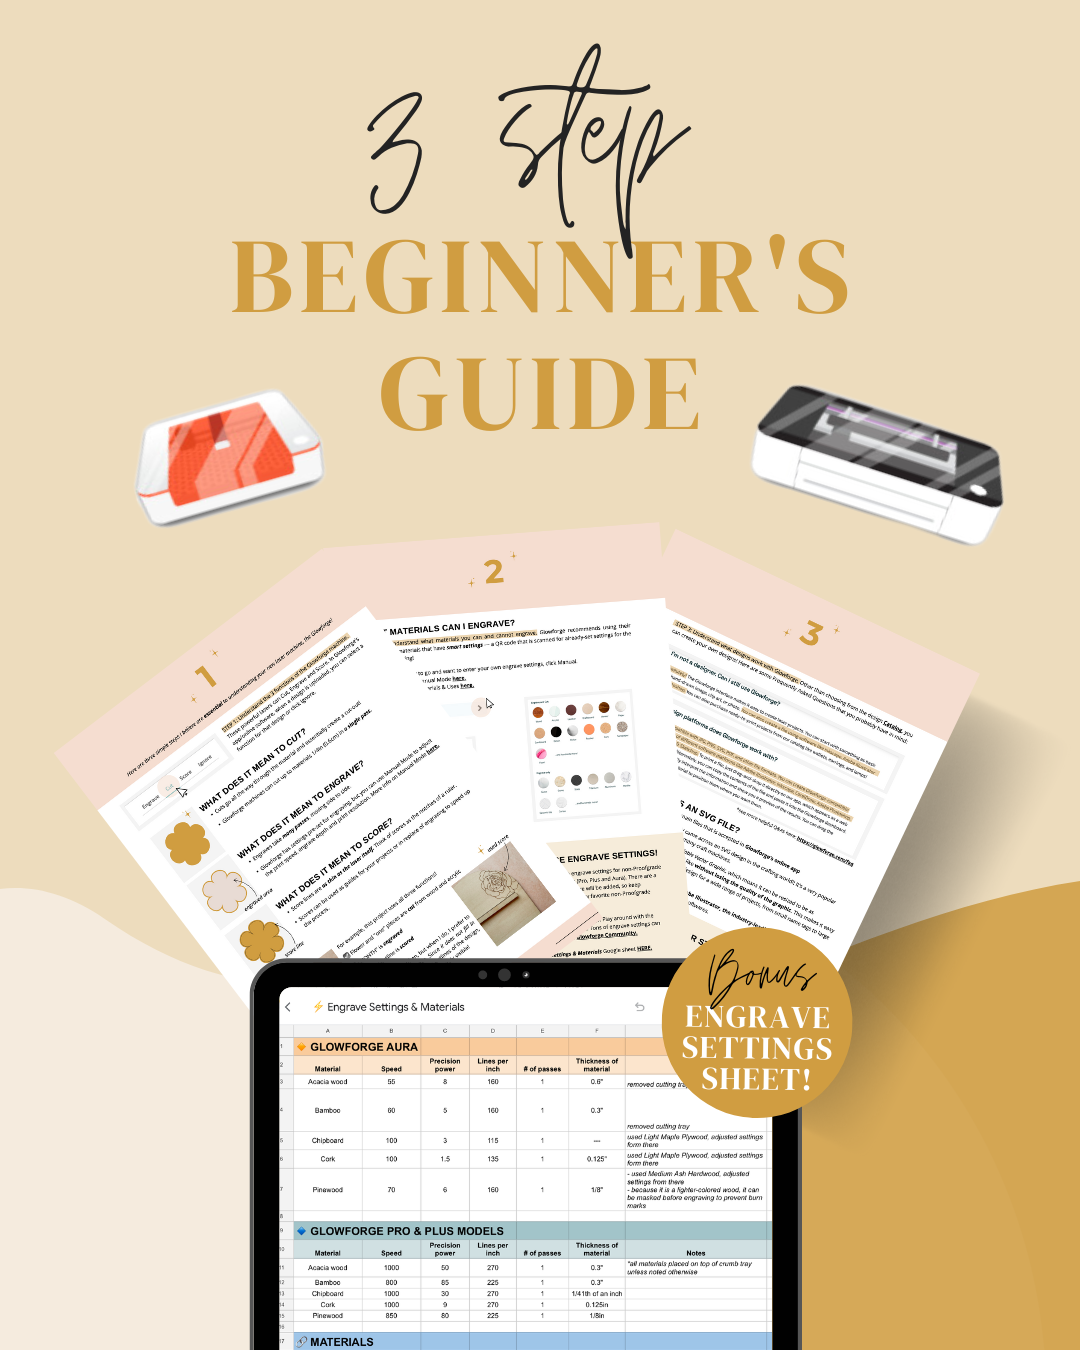
➡️ Want these settings all in one place? Download my BEGINNER’S GUIDE & ENGRAVE SETTINGS SHEET below! ✨
Remember, these settings are starting points. Depending on the specific characteristics of your material and the desired outcome, you may need to fine-tune the settings slightly. Try engraving on a scrap piece or small portion of the same material to ensure the desired effect before moving on to your final project!